Shake It Up: The Home Cook's Playbook for Thick, Dreamy, Next-Level Milkshakes
Let's be honest. We've all tried to make a milkshake at home, only to end up with something that looks more like chocolate milk than the towering, whipped-cream-crowned masterpiece we had in mind. You pour it out, take a sip, and wonder what went wrong. Here at Grill 'N Shake, shakes are practically our middle name—so we figured it was time to spill every secret we know about crafting a legitimately great milkshake right in your own kitchen.
Whether you're planning a backyard cookout and want a killer dessert to follow your grilled burgers, or you just want to treat the kids on a Saturday afternoon, this guide has you covered. No culinary degree required.
Start With the Right Equipment (It Actually Matters)
Before you even think about flavors, let's talk tools. The single biggest reason homemade shakes fall flat? A weak blender. A basic countertop blender with a flimsy motor will struggle to properly break down ice cream, leaving you with uneven chunks or an over-blended, soupy mess.
You don't need to drop $500 on a commercial-grade machine, but investing in a blender with at least 700 watts of power makes a noticeable difference. Brands like Vitamix, Ninja, and Oster's higher-end lines are solid choices in the $80–$200 range. If you're really serious about your shake game, a classic Hamilton Beach drink mixer—the kind you see at old-school diners—is surprisingly affordable and produces that perfectly aerated, creamy texture that's hard to beat.
Also worth grabbing: a set of wide-mouth mason jars or tall milkshake glasses. Presentation is half the fun, and sipping a shake out of the right vessel genuinely makes it taste better. Science? Maybe not. But trust us on this one.
The Ice Cream Rule You're Probably Breaking
Here's the most common mistake people make: using ice cream straight out of a rock-hard freezer. When your ice cream is too frozen, your blender has to work overtime, and you end up adding too much milk to compensate—which tanks the thickness.
The fix is simple. Pull your ice cream out of the freezer and let it sit on the counter for about 5 to 7 minutes before blending. You want it slightly softened but not melty. This sweet spot gives you that luscious, spoonable consistency that blends into a thick, creamy shake without needing a ton of liquid.
As for the ice cream itself, full-fat premium brands like Tillamook, Häagen-Dazs, or Blue Bell make a world of difference compared to lower-fat options. More fat content means more richness and a shake that holds its texture longer.
Milk Ratios: Less Is More
If thickness is your goal—and it should be—resist the urge to pour in a lot of milk. A good starting ratio is about 3 large scoops of ice cream (roughly 1.5 cups) to just 2–3 tablespoons of whole milk. Yes, that little. You can always add more liquid a splash at a time if the blender is struggling, but you can't un-thin a shake once you've gone too far.
Whole milk is standard, but for an even richer result, try swapping in half-and-half or even heavy cream. Some shake purists use no milk at all and just rely on the ice cream's own moisture. Experiment and find your preferred consistency.
Flavor Layering: The Move Most People Skip
A great milkshake isn't just one flavor dumped in a blender. Think of it like building a good playlist—you want layers, contrast, and a few surprises that keep things interesting.
Start with a base (your ice cream flavor), then add a booster. A booster can be a flavored syrup, a spoonful of nut butter, a splash of cold brew coffee, a tablespoon of malt powder, or even a pinch of sea salt to cut sweetness. From there, consider a mix-in for texture—think crushed Oreos, graham cracker crumbs, caramel bits, or toasted coconut flakes.
Some trending combinations worth trying at home:
- Strawberry Basil: Vanilla ice cream + fresh strawberries + a few basil leaves + a drizzle of honey. Sounds unusual, tastes incredible.
- Brown Butter Pecan: Butter pecan ice cream + a splash of bourbon extract + crushed pecans + caramel syrup.
- S'mores Shake: Chocolate ice cream + marshmallow fluff + crushed graham crackers + a torched marshmallow on top (your grill lighter works perfectly for this).
- Mango Tajín: Mango sorbet + vanilla ice cream + a squeeze of lime + a dusting of Tajín on the rim. A nod to the Mexican street food flavors that are absolutely everywhere right now.
Troubleshooting Common Shake Disasters
It's too thin. You added too much liquid. Next time, start with less milk. To rescue this batch, add another scoop of ice cream and blend briefly.
It's too thick to blend. Your ice cream was too hard. Let it soften more next time. In the moment, add liquid one tablespoon at a time until the blender can move.
It tastes flat or bland. You skipped the flavor boosters. Add a pinch of salt (seriously, it wakes everything up), a splash of vanilla extract, or a bit more of your primary flavoring agent.
It separated or got watery fast. This usually means the ice cream was already starting to melt before you blended. Work quickly and serve immediately—milkshakes don't wait around.
The Finishing Touch: Toppings That Make It Instagram-Official
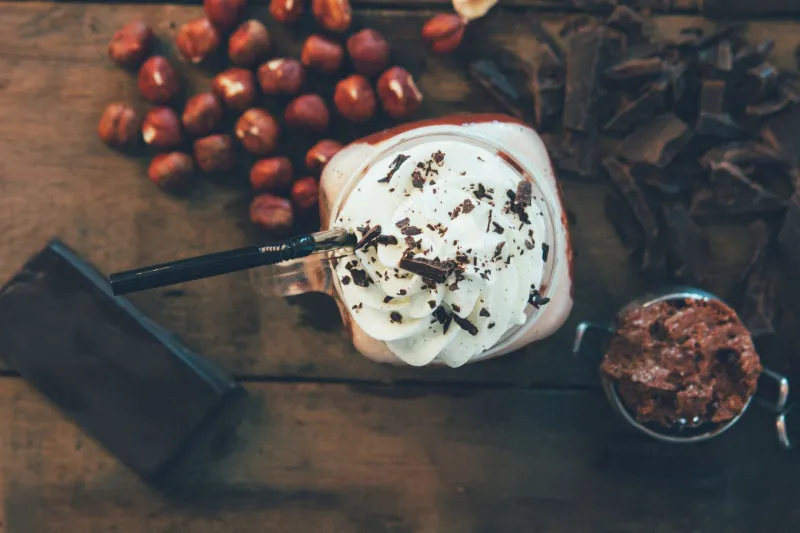
A bare shake is fine. A dressed-up shake is an event. Whipped cream is the obvious starting point, but don't stop there. Try a drizzle of hot fudge or caramel sauce, a cherry on top (maraschino or fresh), crushed candy, mini donuts on the rim, or even a small skewer of grilled fruit if you want to lean into that Grill 'N Shake spirit.
Serve your shakes alongside a fresh-off-the-grill burger or some grilled chicken sliders for the full experience—because at our house, the chill always follows the grill.
Now go blend something worth bragging about.